In my first blog post, I talked about a “less is more” approach as it relates to setting input levels in digital recording. Ultimately, though, “less is more” applies to a lot of different areas of my recording and mixing routine, especially when it comes to equalization. I make extensive use of subtractive equalization when I’m working on a project. This “less is more” approach quickly and easily makes mixes sound clearer and helps prevent gain staging issues.
What Is Subtractive Equalization?
Subtractive equalization is a technique in which, instead of boosting frequencies to make a source more pleasing, you attenuate the frequencies that are unwanted, not pleasing, or causing problems in the mix. This brings out the frequencies that you want to hear by reducing those that you don’t.
How Do I Use Subtractive Equalization?
Let’s say I’m mixing and I notice that the clean electric guitar doesn’t sound bright enough. I could turn up the highs on the equalizer, but, by doing so, I’m technically increasing the level of the electric guitar. Unless I adjust the level of the guitar back down, I’m causing gain staging issues. Additionally, if I boost the same frequency range on all of the channels of a mix, that frequency range will become harsh and I’ll constantly be working backwards to bring it back down on individual channels.
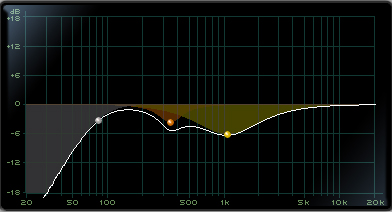
Conversely, if I use subtractive eq, I realize that the reason the highs on the electric guitar aren’t coming through is because there’s too much low-middle frequency information. Using the low-mid portion of my equalizer, I set a high Q, I significantly boost the low-mids so that they stand out and then sweep the low-mids until I find the offending frequency that’s causing the electric guitar to sound muddy. I then cut at this frequency until the highs start coming through the way I want them to. Rarely do I do this by soloing the channel in question as the offending frequency will jump out at you when you’re listening to the whole track. Additionally, by cutting the frequency, I’m not increasing the level of the guitar, so I’m not going to cause gain staging issues or create any unnecessary buildup of frequencies.
High-Pass and Low-Pass Filters
Other tools that I use in a similar fashion are high-pass and low-pass filters. These are filters that attenuate signals below (high-pass) or above (low-pass) a cutoff frequency. For example, if I engage a high-pass filter and set the cutoff frequency of the high-pass filter to 100Hz, the filter will attenuate any signal below 100Hz and allow anything over 100Hz to pass through without attenuation. Conversely, if I engage a low-pass filter and set the cutoff frequency of the low-pass filter at 100Hz, the filter will attenuate any signal above 100Hz and allow anything below 100Hz to pass through without attenuation.
How Do I Use These Filters?
For high-pass filters, you can check the frequency range of the instrument you’re recording or mixing and set the cutoff frequency of the filter at the lowest frequency of the instrument’s spectrum. I usually set the high-pass filter by ear by engaging the filter and increasing the cutoff frequency until I hear the lows start to roll off and then back it off slightly. Using high-pass filters in this fashion helps to prevent low frequency buildup that results in a muddy mix.
For low-pass filters, I will do the same type of thing that I did with the high-pass filters only in reverse and at the top end of the frequency spectrum. Sometimes, if I want there to be extra air on an instrument, I’ll simply turn on the low-pass filter and set it for the highest cutoff frequency possible. It may not seem like it’s doing much, but it does remove harshness when done on every channel.
Try It For Yourself
Subtractive equalization is a “less is more” approach that I’ve found yields great results. There are a number of great tutorials out there on the web for using subtractive equalization, so feel free to check those out and then, most importantly, get in there and try it out and see if it works for you.

